
How to Maximize Vertical Storage in Small Rooms: A Complete Guide
Small rooms often feel like a puzzle. You want more space, but the floor plan says no.
The good news? Your walls hold the answer. Most people only look at floor space and forget the empty air above them.
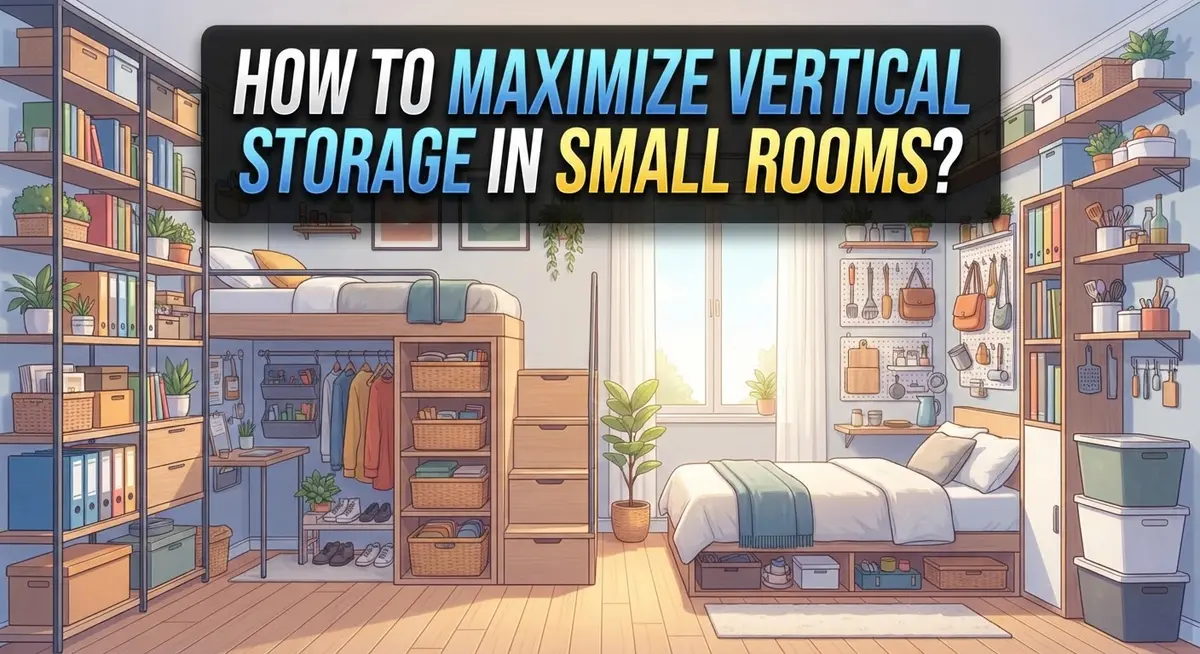
Vertical storage changes everything. It turns unused wall height into real, functional space. Think shelves, pegboards, and stacked bins that work hard without taking up room.
This article shows you how to think upward instead of outward. You will learn simple ways to install shelving, use closet height wisely, and pick furniture that does double duty.
We will also cover common mistakes people make when organizing small spaces. Many folks leave wall height completely unused. Others forget that closets have depth and height beyond eye level.
By the end, you will know exactly how to maximize every inch of your small room. No construction skills needed. Just smart planning and a fresh way of looking at your space.
Ready to make your small room feel bigger? Let us get started.
In a Nutshell
Here is a quick recap to keep in mind:
-
Use your wall space first. Empty walls are wasted space. Shelves, hooks, and pegboards turn blank walls into useful storage spots.
-
Pick furniture that does double duty. A storage ottoman or a sofa bed gives you seating and storage in one piece.
-
Go tall, not wide. Stack bins and boxes upward in closets and cabinets. This frees up floor space for movement.
-
Fill your closet from top to bottom. Add a small dresser or cube unit at the bottom. Use the top shelf for items you rarely need.
-
Watch out for empty walls and unused corners. These spots often get ignored, but they can hold shelves or hanging baskets.
-
Repurpose what you already own. An old bookshelf or ladder can become a creative storage piece with a little imagination.
Small changes like these add up fast. Your room will feel roomier without adding a single square foot. The goal is simple: think up, not out.
Why Vertical Storage Matters in Small Spaces
Small rooms demand smart thinking. When floor space is limited, your walls become your best friend. Vertical storage lets you store more without cluttering the ground.
Why does this matter? Floor space affects how a room feels. A crowded floor makes rooms feel smaller and harder to move through. Vertical storage keeps pathways clear and open. Your room instantly feels larger when you can walk freely.
Limited square footage means every inch counts. Most small rooms waste valuable wall space. That blank wall above your desk? Perfect for shelves. The area behind your door? Ideal for hooks or organizers. These spots cost you nothing but gain you tons of storage.
Multi functional furniture solves two problems at once. A storage ottoman holds blankets while serving as a seat. A sofa bed provides sleeping space and hides items underneath. These pieces work harder than regular furniture, which is essential when space is tight.
Vertical organization also improves daily life. You find things faster when everything has a designated spot up high. No more digging through piles on the floor. Items stored vertically are easier to see and reach.
Small rooms teach us to be intentional. You cannot afford to waste any storage opportunity. Going vertical forces you to think creatively about unused areas. Shelves on walls, hanging systems in closets, and stacked drawers all add up.
The result? Your small room functions like a larger space. You have room to breathe, move, and live comfortably. Vertical storage is not just about fitting more stuff in. It is about creating a space that actually works for you.
Assessing Your Room’s Vertical Potential
Before you start installing shelves or buying storage units, take a moment to assess what your room can actually offer. This step prevents wasted effort and ensures your vertical storage plan works for your space.
Start by measuring your walls from floor to ceiling. Write down the height of each wall, including any sloped ceilings or architectural features. Next, identify which walls can hold weight. Load bearing walls support more storage than others. Check for studs behind drywall using a stud finder or by tapping gently with your knuckles. Studs create solid anchor points for shelves and heavy items.
Look at your room’s natural light sources. Windows and doors limit where you can place storage. Shelves near windows block light, making rooms feel smaller. Plan your vertical storage away from these areas when possible.
Examine your closets carefully. Measure the depth, width, and height. Many closets waste space because people only use the rod for hanging clothes. The floor below and walls above offer excellent storage opportunities.
Check for corner spaces, wall areas above doorways, and the space between furniture pieces. These overlooked zones often become prime real estate for vertical storage.
Consider your room’s traffic flow. Storage placed directly in walkways creates obstacles and safety hazards. Plan your vertical storage along walls that don’t interfere with movement.
Finally, think about what you actually need to store. Different items require different storage heights. Heavy objects belong lower. Seasonal items work well in higher spaces. Frequently used items should stay at arm level.
Taking these few minutes to assess your room prevents costly mistakes and helps you create a storage plan that truly fits your space.
Step-by-Step: Installing Wall Shelves and Cabinets
Installing wall shelves and cabinets transforms empty walls into functional storage. This process requires planning, the right tools, and careful execution.
Start by locating wall studs. Use a stud finder to mark studs on your wall. Shelves and cabinets must anchor into studs for safety. Mark these locations with a pencil before drilling any holes.
Measure twice, drill once. Determine your shelf height based on what you’ll store. Items you use daily should sit at eye level. Less frequently used items can go higher or lower. Use a level to ensure your shelf brackets are perfectly straight. Crooked shelves look unprofessional and items slide off.
Choose appropriate hardware. Heavy cabinets need heavy duty brackets rated for your storage weight. Light shelves can use simpler mounting systems. Check weight limits on all hardware before installation.
Install brackets securely. Drill pilot holes first to prevent wall damage. Insert anchors if you’re not drilling into studs. Tighten all bolts and screws firmly. Loose hardware creates safety hazards.
Mount your shelves or cabinets. Slide shelves onto brackets and secure them according to manufacturer instructions. For cabinets, have someone help you hold it level while you fasten it to the wall.
Test stability before loading. Push on your installed shelves gently. They should not move or flex. Only then should you add your items.
Organize strategically. Place heavier items on lower shelves. Use bins and organizers to group similar items. Label everything so you remember what’s stored where.
Proper installation ensures your vertical storage lasts for years and keeps your belongings safe and accessible.
Maximizing Closet Height and Depth
Your closet holds more potential than you realize. Most people waste valuable vertical space by storing items only on the floor or a single rod. The key is thinking upward.
Start by measuring your closet’s full height and depth. Many closets extend several feet above where clothes typically hang. This unused space becomes prime real estate for storage. You can add shelves above existing hanging rods, creating zones for different items.
Install adjustable shelving at various heights. This flexibility lets you store folded sweaters, boxes, or seasonal items without wasting space. Place heavier items on lower shelves and lighter ones higher up. Shelving units that stack vertically work wonderfully in closet bottoms too.
Hanging organizers maximize depth efficiently. Over the door organizers, hanging shelves, and cascading hangers all use space you already have. These systems keep frequently used items visible and accessible. They also prevent items from getting lost in the back.
Add a second hanging rod below your existing one. This doubles your hanging capacity instantly. Use the upper rod for longer items like coats or dresses. Reserve the lower rod for shirts, pants, or shorter garments.
Consider corner space carefully. Corners often go unused. Small shelving units or rotating organizers fit perfectly in these spots. They capture dead space that would otherwise sit empty.
Depth matters as much as height. Pull items forward so nothing hides in the back. Use shelf dividers to keep stacks from toppling. Label boxes clearly so you know what’s stored where.
The result is a closet that works harder for you. You’ll find items faster and store significantly more without expanding your room’s footprint.
Choosing Multi-Functional Furniture for Storage
Multi-functional furniture serves as your secret weapon for small room storage. These pieces work double duty by providing seating, sleeping, or work surfaces while hiding storage underneath or inside.
Storage ottomans are excellent starting points. They offer a place to sit or rest your feet, yet open to reveal compartments inside. You can store blankets, pillows, books, or seasonal items without taking up extra floor space. The ottoman sits in your room doing two jobs at once.
Sofa beds combine seating with sleeping functionality and often include under-seat drawers. When guests arrive, you have a bed. When they leave, you have a couch. The hidden storage compartments hold extra linens, clothing, or items you rarely use.
Cube storage units work vertically and provide flexibility. Stack them high on your walls, then add baskets or boxes inside each cube. You create custom storage that matches your exact needs. Some cubes have doors that hide clutter completely.
Extendable tables expand when you need workspace and collapse to save floor area. Underneath, you can position rolling storage carts that slide out when needed. This approach keeps your room open while maintaining storage access.
Shelving units that double as room dividers maximize vertical space while organizing your room’s layout. Place them between two zones to create separation and storage simultaneously.
Dressers with built-in mirrors combine furniture functions effectively. The mirror serves your daily routine while drawers store clothing, accessories, or miscellaneous items. Wall-mounted desks with shelving above create workspace and storage in one compact unit.
When selecting multi-functional pieces, measure your available floor space first. Choose furniture that fits your room’s dimensions and serves your actual storage needs. This prevents buying pieces that waste space or don’t solve your organization problems.
Creative Solutions: Pegboards, Hooks, and Hanging Systems
Pegboards offer a straightforward way to organize small spaces. These boards have holes that accept hooks, shelves, and baskets in any arrangement you choose. You can rearrange items whenever your needs change, making pegboards extremely flexible.
Start by selecting a pegboard size that fits your wall. Measure the space carefully before purchasing. Install the board securely into wall studs using appropriate anchors. The board must support the weight of everything you hang on it.
Hooks come in many styles and sizes. Small hooks work for lightweight items like keys, cords, and jewelry. Larger hooks hold heavier objects such as bags, tools, or kitchen utensils. Arrange hooks at comfortable heights so you can reach everything easily.
Hanging systems go beyond simple hooks. Track systems mount to walls and accept various attachable organizers. These systems let you customize your storage layout without drilling multiple holes. Baskets and bins slide onto tracks, creating designated zones for different items.
Consider what you’ll store before installing anything. Frequently used items should hang at eye level. Less common things can go higher or lower. This strategy saves time and reduces frustration when searching for items.
Combination approaches work best. Mix pegboards with shelves and hanging baskets to create layered storage. This method uses every inch of wall space efficiently.
The beauty of these solutions lies in their adaptability and accessibility. You see everything at a glance, making it easy to find what you need. Items stay off your floor and furniture surfaces, opening up your room visually. Pegboards and hanging systems transform bare walls into organized storage powerhouses without requiring permanent renovations or taking up any floor space.
Common Mistakes to Avoid When Going Vertical
Overloading shelves is a major problem people make. Heavy items stacked too high create safety risks and can damage walls. Distribute weight evenly across shelves and follow weight limits your hardware specifies.
Ignoring wall condition leads to installation failures. Some walls cannot support heavy shelving systems. Check what’s behind your walls before drilling. Drywall needs proper anchors. Plaster requires different fasteners. Concrete demands special equipment. Knowing your wall type prevents costly mistakes.
Forgetting about accessibility happens often in vertical storage. Items stored too high become unreachable for daily use. Items stored too low waste valuable eye level space. Place frequently used things at arm height. Seasonal items can go higher or lower.
Mixing storage styles creates visual chaos. Combining too many different shelf types, bins, and hanging systems makes rooms feel cramped. Choose a consistent approach. Stick with matching containers and uniform shelf spacing.
Neglecting to measure before buying storage solutions wastes money and space. Measure your wall height, width, and depth accurately. Account for existing furniture and fixtures. Check ceiling height to avoid bumping your head.
Overcrowding vertical space defeats the purpose. Just because you can stack items doesn’t mean you should. Leave breathing room between items. This prevents accidents and keeps spaces looking organized.
Failing to plan shelf placement causes regret later. Think about what you’ll store before installation. Heavy items need lower shelves. Light items work fine higher up. Reversing this creates structural problems.
Avoiding these mistakes makes vertical storage effective and safe. Take time to plan properly. Measure twice. Install once. Your small room will feel larger and more functional.
Maintaining and Adapting Your Vertical Storage System
Your vertical storage system needs regular attention to stay functional and adapt to your changing needs. Check your shelves and wall mounted systems every few months. Look for signs of wear, loose brackets, or items that have shifted out of place.
Dust and clean your vertical storage regularly. Dust collects on shelves and pegboards, making items harder to see. Wipe down surfaces with a soft cloth. This keeps your system looking fresh and helps you spot any damage early.
Reorganize as your lifestyle changes. What worked last season might not work now. Move frequently used items to eye level. Store seasonal belongings higher up or in less accessible spots.
Check weight distribution on your shelves. Heavy items should sit on lower shelves close to support beams. Lighter items belong higher up. This prevents shelves from sagging and keeps everything stable.
Inspect wall anchors and brackets twice yearly. Tighten any loose screws or bolts you find. Replace damaged anchors immediately. A falling shelf creates safety hazards and damages your belongings.
Adapt your system as your room’s purpose changes. If you work from home now, you might need more desk storage. Reorganize your vertical space to match your new routine. Move items around instead of buying new furniture.
Label your shelves and storage bins clearly. This helps everyone in your household find things quickly. Labels also remind you what goes where when you reorganize.
Consider seasonal adjustments. Winter coats need different storage than summer clothes. Rotate what hangs on pegboards and what sits on shelves based on the season. This keeps your system efficient year round.
Final Thoughts
Small rooms don’t have to feel cramped or cluttered. Vertical storage gives you the power to change that.
Your walls hold more potential than you think. Every empty space above eye level is a chance to organize better.
Start small if the idea feels overwhelming. Add one shelf or install one pegboard first. See how it changes your daily routine.
Multi-functional furniture deserves a spot in your plan too. Storage ottomans, sofa beds, and extendable tables solve two problems at once. They save floor space while adding function.
Remember to use your closets fully. Most closets waste vertical space above hanging clothes. Add shelving or stack bins to claim that area.
Cabinets benefit from the same thinking. Stacking drawers and pantry bins turn wasted air into usable storage. This simple shift makes a real difference.
Consistency matters more than perfection. You don’t need to solve every storage problem in one weekend. Small changes add up over time.
Test different setups before committing fully. Move a shelf. Try a new hook placement. Small rooms respond well to experimentation.
Think about how your space will change too. Your storage needs today may differ from next year. Choose systems that flex with your life.
Going vertical transforms how a small room feels and functions. You gain storage without sacrificing floor space. You create order without expensive renovations.
The techniques covered here work for almost any room size or layout. Apply them thoughtfully and adjust as needed.
Your small room can feel spacious and organized. Vertical storage makes that possible, one smart choice at a time.
Frequently Asked Questions
Can I install vertical storage without damaging my walls?
Yes, you can install storage safely with the right approach. First, check your wall type (drywall, plaster, or concrete). Use appropriate wall anchors for drywall to support weight properly. For heavier installations, locate wall studs and anchor directly into them.
Start with lighter items on upper shelves. Test your installation with weight before filling it completely. If you rent, adhesive strips and command hooks offer temporary solutions that don’t leave permanent damage.
What’s the best way to organize a small closet vertically?
Stack shelving units from floor to ceiling to capture all available height. Place heavier items on lower shelves and lighter ones higher up. Use hanging rods at two levels instead of one to double your hanging space.
Add bins or boxes on upper shelves for seasonal items. Reserve eye level for frequently used pieces. This approach keeps daily essentials accessible while storing occasional items overhead.
How do I prevent my vertical storage from looking cluttered?
Consistency is your key tool here. Use matching containers, bins, or baskets throughout your space. This creates visual harmony even when shelves are full. Label everything clearly so items stay organized long term.
Group similar items together on each shelf. Keep one shelf slightly less full to give your eye a resting place. Vertical storage works best when it follows a system, not when items scatter randomly across walls.
Which furniture pieces work best for small rooms?
Multi functional pieces solve two problems at once. Storage ottomans provide seating and hidden storage. Sofa beds offer sleeping space plus under cushion storage. Cube units work as bookshelves, dressers, or display stands.
These pieces maximize your floor space while keeping storage accessible and visible.

Phil is the founder and creative mind behind Aesthetic Space Finds, a home decor enthusiast dedicated to helping people transform their living spaces through honest product reviews, in-depth comparisons, and expert buying guides. With a keen eye for design and a passion for discovering hidden gems in the world of home accessories, Phil curates content that makes stylish, functional living accessible to everyone.


