
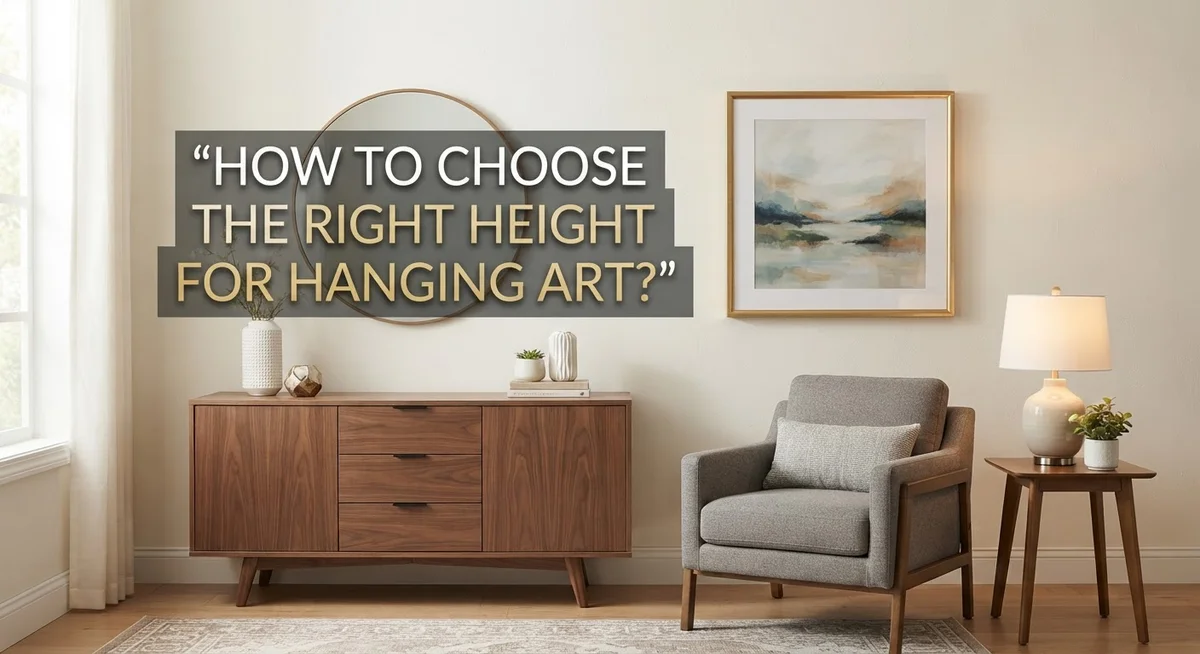
How to Choose the Right Height for Hanging Art?
Hanging a new piece of art feels exciting. But then you stare at the blank wall and wonder where to actually put it.
Hang it too high, and it looks disconnected from the room. Hang it too low, and it feels awkward next to your furniture.
The good news? There is a simple rule that solves this problem every time. Interior designers use it, and now you can too.
The magic number is 57 to 60 inches from the floor to the center of your artwork. This matches average eye level, so your piece feels balanced in almost any room.
This article breaks down everything you need to know about art height. You will learn the core rule for standalone walls. You will discover how to adjust spacing above furniture like sofas and beds.
We will also cover common mistakes people make, plus quick tips for tall ceilings and multi piece arrangements.
By the end, you will hang art with confidence. No more guessing. No more extra nail holes. Just a wall that looks intentional and polished every time.
In a Nutshell
Here’s the quick rundown for hanging art the right way:
-
Center your art at 57 to 60 inches from the floor. This is the golden rule for most walls.
-
Measure first. Find your artwork’s height, divide it by two, and mark that center point on the wall.
-
Leave 6 to 8 inches between the bottom of your art and any furniture below it.
-
Fill 50 to 67% of the wall space above furniture for a balanced look.
-
Avoid common slip ups. Do not hang too high, skip the gap rule, or ignore your artwork’s actual size.
-
Adjust for special cases. Taller ceilings may need a slight upward shift. Multi piece arrangements need consistent spacing between each frame.
Remember, the center point is your best friend here. It matters more than where the top edge lands. Once you nail this simple math, every piece you hang will feel balanced and just right for the room.
Understanding the Standard Eye-Level Rule
The eye level rule is your foundation for hanging art correctly. Most people’s eyes sit at about 57 to 60 inches from the floor when they stand naturally. This is why museums and galleries use this exact measurement. Your brain feels comfortable viewing art at this height.
Start by measuring your artwork. Find the total height of the piece. Divide that number by two. This gives you the center point of your art. The center point is what matters most, not the top edge.
Now mark 57 to 60 inches on your wall. Use a pencil and a level to make a small, light mark. This is where your artwork’s center should go. You can erase the mark after hanging.
The furniture rule changes things slightly. If you hang art above a sofa, chair, or shelf, keep 6 to 8 inches of space between the bottom of your art and the top of the furniture. This gap makes the arrangement feel intentional and balanced. The artwork should cover 50 to 67 percent of the wall space above the furniture piece.
Many people hang art too high. This happens because they measure from the top of the frame instead of the center. High placement makes viewers crane their necks. It also makes rooms feel disconnected and awkward.
Ceilings change the equation slightly. If your ceilings are unusually tall (10 feet or higher), you can shift the center point up by a few inches. This prevents art from looking too low on the wall. Adjust only by 2 to 4 inches though. Stay close to the standard rule.
The eye level rule works for almost every situation. It removes guesswork from the process. Follow this method, and your art will hang at the perfect height every time.
Step-by-Step: Measuring and Marking the Perfect Spot
Measuring and marking your wall correctly makes the difference between art that looks intentional and art that feels out of place. Start by gathering a simple tape measure, a pencil, and a level. These three tools are all you need.
First, find the center point of your artwork. Measure the total height of the piece from top to bottom. Divide that number by two. This gives you the exact center. For example, if your artwork is 24 inches tall, the center point is 12 inches from the top edge.
Next, locate the 57 to 60 inch mark on your wall. Use your tape measure to find this height from the floor. This is where the center of your artwork should sit. Mark this spot lightly with a pencil. A small dot works perfectly and erases easily later.
If you are hanging art above furniture, the process changes slightly. Measure up from the top of your sofa, shelf, or chair. Add 6 to 8 inches to that measurement. This new number becomes your mark on the wall. This spacing keeps your art connected to the furniture below without crowding it.
Use your level to ensure the mark is straight. A tilted mark leads to tilted art. Take a moment to double check this step.
When hanging multiple pieces, measure each artwork individually. Find the center point of each piece. Mark all positions before making any holes. This prevents mistakes and saves wall damage.
Step back and look at your marks from across the room. Do they feel balanced? Does the spacing look right? Trust your eye here. Small adjustments at this stage take seconds but improve the final result significantly.
Once you are satisfied with your marks, you are ready to hang. The measuring work you did now makes installation straightforward and stress free.
Hanging Art Above Furniture: Spacing Guidelines
When you hang art above furniture, spacing makes all the difference. The distance between your artwork and the furniture below it creates visual balance and prevents the room from feeling cramped.
Start with the 6 to 8 inch rule. This gap should sit between the bottom edge of your artwork and the top surface of your furniture. This spacing feels natural to the eye and creates breathing room on your wall. Too little space makes the arrangement feel crowded. Too much space breaks the connection between the art and the furniture it anchors.
Next, consider how much wall space your art should fill. Your artwork should cover 50 to 67 percent of the wall area above the furniture. This percentage creates a balanced composition. If your art fills less than half the space, it looks small and lost. If it fills more than two thirds, it can overwhelm the furniture below.
Here’s how to check your spacing before you commit. Tape the artwork to the wall at your planned location. Step back and view it from different angles in the room. Does it feel connected to the furniture? Does the gap look intentional? Trust your instincts here. If something feels off, adjust and check again.
Remember that furniture height varies. A low console table requires different spacing than a tall bookshelf. Measure your specific furniture piece and work from there. The 6 to 8 inch guideline adapts to your situation.
When you hang multiple pieces above one furniture item, apply this spacing rule to the entire arrangement as a group. Treat all the artwork together as one visual unit. The gap should exist between the lowest point of your entire arrangement and the furniture top. This keeps everything cohesive and intentional looking.
Adjusting Height for Ceiling Size and Room Layout
Ceiling height changes how you should hang your artwork. Standard rules work well for typical 8 foot ceilings. Higher ceilings need adjustments to keep art from looking too low on the wall.
Measure your ceiling height first. If you have 9 foot or 10 foot ceilings, the standard 57 to 60 inch eye level rule still applies. Your eye doesn’t change height just because the room is taller. However, the extra wall space above your head means you have more flexibility.
With high ceilings, you can shift artwork slightly higher than the standard rule. Move the center point up by 2 to 4 inches if your ceiling exceeds 9 feet. This prevents art from appearing to float too low in an oversized space. The artwork should still feel connected to the wall and furniture below it.
Room layout affects placement too. A narrow hallway needs different thinking than a spacious living room. In tight spaces, keep artwork at standard eye level to avoid overwhelming the area. Larger rooms with high ceilings give you more room to experiment.
Consider your furniture arrangement when adjusting for ceiling height. If a sofa sits beneath high walls, the 6 to 8 inch spacing rule still matters most. The gap between furniture and art is more important than ceiling height. Maintain this spacing regardless of how tall your walls are.
Think about sight lines from different angles. Stand at various points in your room. Walk across the space and observe how the artwork looks. High ceilings sometimes trick you into hanging art too far up. Trust what feels comfortable to your eyes rather than just following measurements.
Group multiple pieces with the same care. Each artwork should maintain proper spacing from furniture and from other pieces. Ceiling height influences the overall arrangement but doesn’t change the core spacing rules that make art look intentional and balanced.
Arranging Multiple Pieces and Gallery Walls
When you arrange multiple pieces together, consistency becomes your best friend. Think of your gallery wall as one large composition rather than individual artworks. Each piece needs to work with its neighbors to create visual harmony.
Start by laying all your artwork on the floor first. Arrange them in different configurations until you find a layout that feels balanced. Some people prefer symmetrical grids where pieces align perfectly. Others choose salon style arrangements with varied spacing for a more relaxed look. Both work beautifully when done with intention.
Once you settle on your layout, measure the overall dimensions of your entire arrangement. Find the center point of this group just as you would for a single piece. This group center should still align with the 57 to 60 inch eye level mark on your wall.
Spacing between individual pieces matters significantly. Most designers recommend 2 to 3 inches between frames for a cohesive look. Consistent spacing creates rhythm and prevents your wall from feeling chaotic. Measure these gaps carefully before drilling any holes.
When hanging above furniture, apply the 6 to 8 inch spacing rule to your entire gallery arrangement as a group. The bottom edge of your lowest piece should maintain this distance from the furniture top. Your complete arrangement should still fill 50 to 67 percent of the wall space above the furniture.
Use painter’s tape to map out your design on the wall before hanging anything. This lets you see the full effect and adjust spacing without making holes. Step back frequently and view your arrangement from different distances in the room.
Mark each hanging point clearly once you approve the layout. This prevents mistakes and saves time during installation. Take photos of your tape layout for reference while you work.
Common Mistakes to Avoid When Hanging Art
Hanging artwork requires precision, but many people make simple errors that ruin the final look. Understanding these mistakes helps you avoid frustration and wasted wall holes.
Hanging too high is the most common problem. Many people place artwork above eye level, which makes the piece feel disconnected from the room. Your eyes should naturally land on the center of your art without tilting your head up. If you hang art near the ceiling, it becomes a visual afterthought rather than a focal point.
Using the top edge as your reference point causes misalignment. You should always measure to the center of your artwork, not the top. Find the center by dividing the artwork height in half. Mark 57 to 60 inches on your wall at this center point. This simple step prevents the common mistake of positioning art too high.
Ignoring furniture placement creates spacing problems. Your artwork should sit 6 to 8 inches above furniture, not touching or hovering too far away. Measure this gap carefully before drilling holes. Guessing distances leads to awkward spacing that looks unfinished.
Forgetting to account for artwork dimensions leads to poor proportions. A small print needs different spacing than a large canvas. The same eye level rule applies, but the visual impact changes based on size. Larger pieces may feel better slightly adjusted for your specific room.
Inconsistent spacing in multi piece arrangements ruins the effect. Each piece must maintain equal distance from its neighbors. Uneven gaps make the entire arrangement look accidental rather than intentional.
Measuring only once invites mistakes. Double check your marks before hanging anything. Use a level to ensure your artwork sits straight. These basic steps prevent the frustration of removing and rehinging pieces multiple times.
Troubleshooting: Fixing Art That’s Hung Too High or Low
When art hangs too high or too low, the fix is simple. You need to take it down and rehang it using the correct measurements.
Start by identifying the problem. Art that sits above eye level feels disconnected from the room. Art that hangs too low creates an awkward viewing experience. Stand back and look at your piece from different spots in the room. Your eyes should naturally fall on the artwork without strain.
Measure the center point of your artwork first. Find the middle of the piece by dividing its height by two. This center point matters more than the top edge. Many people make mistakes by measuring from the top instead.
Next, mark 57 to 60 inches on your wall. This is the standard eye level height where the center of your artwork should sit. Use a pencil and a level to make an accurate mark. This ensures your piece hangs straight and at the right height.
If your artwork hangs above furniture, adjust your approach. The bottom edge should sit 6 to 8 inches above the furniture surface. This creates a balanced look and proper spacing. Measure down from your eye level mark to check this distance.
Use painter’s tape to test the placement before making new holes. Tape your artwork to the wall at the new height. Step back and view it from different angles. Walk around the room to see how it looks from various positions.
Once you approve the placement, mark where the hanging hardware should go. Measure carefully from the center mark to determine the exact hole locations. Remove the tape and install your hanging hardware at the marked spots.
Rehang your artwork and check the alignment. The center should align with your 57 to 60 inch mark. Adjust slightly if needed. Take a final step back to confirm the piece looks balanced and sits at a comfortable viewing height.
Final Thoughts
Choosing the right height for your art does not need to feel hard. Once you know the 57 to 60 inch rule, you can apply it to almost any wall in your home.
This simple guideline works for hallways, living rooms, and bedrooms alike. It gives your eyes a natural resting point when you walk into a room.
Remember that the center of your artwork matters most. Not the top edge, and not the frame size alone.
When you hang pieces above furniture, always leave that 6 to 8 inch gap. This keeps the piece connected to the furniture below it, without looking cramped.
Your artwork should also fill a good portion of the wall space. Aim for 50 to 67 percent of the area above your couch, table, or bed frame.
Taller ceilings may call for small adjustments. A slightly higher placement can balance the extra vertical space in the room.
If you are working with multiple frames, keep your spacing even. This creates a clean, organized look that feels intentional.
Mistakes happen, but they are easy to fix. Hanging too high remains the most common issue people face.
Take your time before you commit to a final spot. Measure twice, mark clearly, and check your work before adding any hooks or nails.
Good art placement pulls a room together. It creates flow between your furniture, walls, and personal style.
With these tips, you now have a clear path forward. Trust the numbers, trust your eye, and enjoy the process.
Your walls deserve art that feels balanced and welcoming. Now you have the tools to make that happen every time.
Frequently Asked Questions
What is the standard height for hanging artwork on a wall?
The standard height places your artwork’s center point at 57 to 60 inches from the floor. This matches average eye level and works in most rooms. To find this center point, measure your artwork’s total height and divide it by two. Then mark that 57 to 60 inch line on your wall and align your artwork’s center with that mark.
Should I hang art differently above furniture?
Yes, furniture changes the placement rules. Keep a 6 to 8 inch gap between your artwork’s bottom edge and the furniture’s top surface. Your art should fill about 50 to 67 percent of the wall space above the furniture piece.
This creates visual balance and prevents the artwork from feeling cramped or disconnected from the room below it.
Does ceiling height affect where I hang art?
Taller ceilings may need slight adjustments to the standard 57 to 60 inch rule. In rooms with very high ceilings, you can move your artwork up a bit to maintain visual connection with the space.
However, avoid hanging art so high that people must strain their necks to see it comfortably. The goal is always easy viewing.
How do I hang multiple pieces at the same height?
Treat each artwork individually by finding its center point first. Then align all center points at the same 57 to 60 inch height on your wall.
Maintain consistent spacing between frames for a polished look. Using painter’s tape to test positions before drilling holes helps you get the spacing right.

Phil is the founder and creative mind behind Aesthetic Space Finds, a home decor enthusiast dedicated to helping people transform their living spaces through honest product reviews, in-depth comparisons, and expert buying guides. With a keen eye for design and a passion for discovering hidden gems in the world of home accessories, Phil curates content that makes stylish, functional living accessible to everyone.


